
Eco-Friendly Home Hacks: Save Energy and Reduce Waste
Working with your hands is incredibly fulfilling, and few pastimes provide the same tactile, calming delight as working with clay. Clay art could be the ideal diversion if you’ve ever felt the need to substitute screen time with creative time. It’s a soothing activity that enables you to slow down, concentrate your energies, and transform a plain lump of dirt into a stunning, long-lasting item. It’s more than just a craft. All those tools and approaches can be intimidating when you first start, but you really only need a few fundamental abilities to start unwinding and creating.
Selecting Your Clay and Configuring
You must have the proper materials before you can begin creating masterpieces. The best options for novices working from home without access to a professional kiln are air-dry clay or polymer clay.
Air-Dry Clay: This type of clay solidifies just by being exposed to air. Because it doesn’t require baking, cleanup is simple and it works well for sculpting. It isn’t waterproof or safe for food, though.
Polymer Clay: Until you bake it in your home oven (as directed on the packaging, of course), this clay stays soft. Once baked, it’s resilient and ideal for little, intricate tasks like jewelry or miniature miniatures.
Select a workspace that is simple to clean when setting up; a kitchen table is a good option.
This keeps your workplace neat and stops the clay from sticking.
Crucial Starter Methods
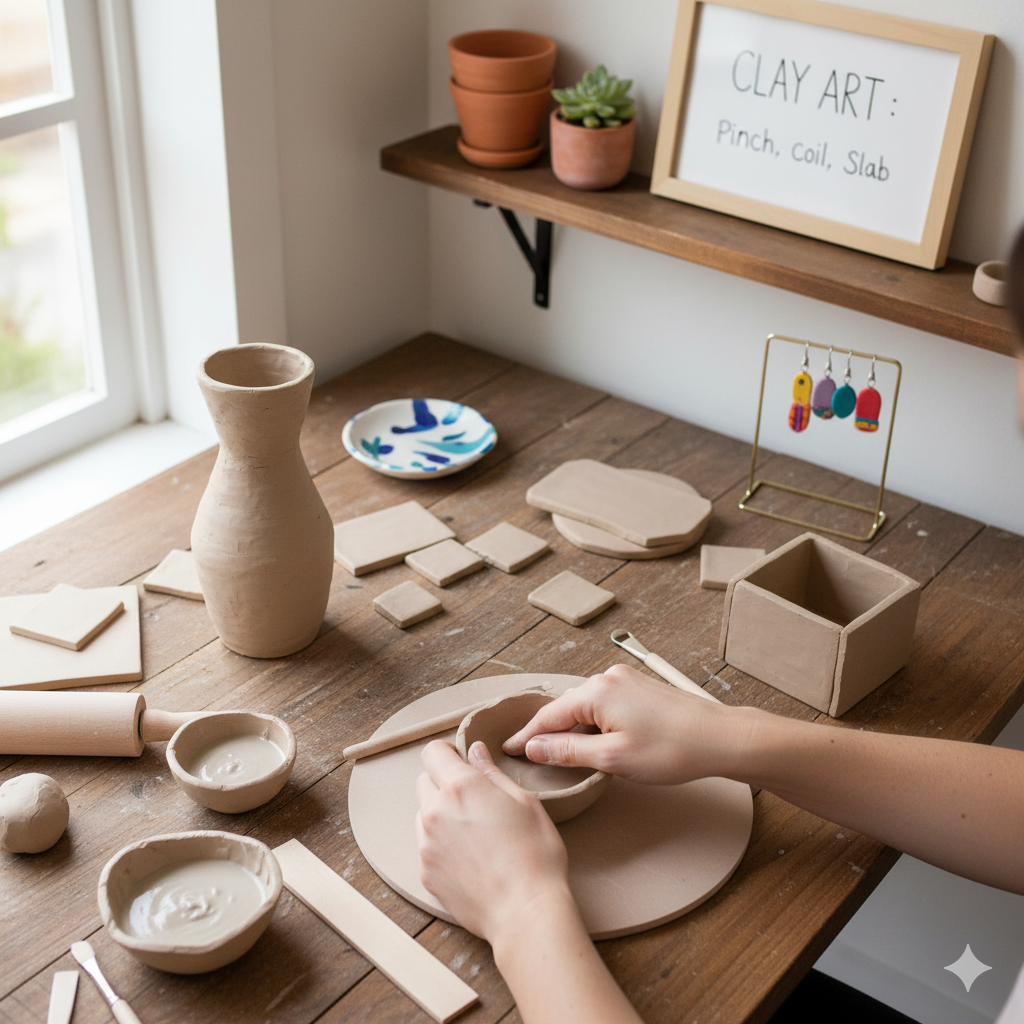
For now, forget about the pottery wheel. We will begin with hand-building, which employs three basic methods: slab, coil, and pinch.
1. The Pinch Method, which works well with bowls and cups
The most logical approach is this one. A ball of clay about the size of an apple should be your starting point.
Keeping the ball in one hand, stop about half an inch from the bottom and softly press your thumb into the center.
Using one hand, turn the clay slowly while using your thumb and fingers to gently pinch the walls.
The objective is to uniformly thin out the walls so that the opening resembles a useful bowl. The sensation of the clay makes this activity incredibly meditative.
Because you can feel the clay react to your touch, this practice is incredibly relaxing.
2. The Coil Method (Texture and Height Construction)
For creating tall, symmetrical shapes like vases, coiling is ideal.
Roll out large clay coils (or ropes) that resemble snakes. Maintain a constant thickness.
To create the base, take your first coil and make it into a flat circular.
Score (or scratch up) the bottom of the subsequent coil and the upper edge of the base. For a solid binding, this scraping produces a rough surface.
Using your finger to smooth the seam, join the coils after applying a small amount of “slip”—clay that has been diluted with water until it becomes creamy—to the scored regions. To increase height, repeat.
3. Using the Slab Method to Make Tiles and Boxes
For organized tasks, this technique use flat slabs of clay.
Roll your clay into even slabs using a rolling pin and guide sticks (or books) of uniform thickness.
For a box, cut the slabs into squares; for a wall tile, cut them into rectangles.
To make robust, sharp corners, push the pieces together then score and slide the edges where the slabs meet.
Completing Your Work
When your work is finished, keep in mind these two final steps:
In a well-ventilated setting, air-dry clay usually takes 24 to 72 hours to completely dry, depending on its thickness. based on the baking instructions for polymer clay.
Sealing and Decorating: Once your sculpture has dried, you can paint it using acrylic paints. To make it more resilient to water and more durable (for air-dry clay), apply a coat of varnish or a clear sealer.
Creating artwork with clay is a powerful way to remind people that errors are common and that sometimes the beauty is in the imperfections. You learn a new language with your hands and your mind is soothed by the creative process on this journey of self-discovery.